Introduction
Blinking an LED is one of the most basic projects for anyone starting with Arduino. It’s a great way to familiarize yourself with the Arduino IDE (Integrated Development Environment), basic coding, and simple circuit setup. In this tutorial, we’ll guide you through the process of blinking an LED with Arduino, explain the code behind it, and help you understand the fundamental concepts of electronics and programming.
Whether you’re a beginner or looking to refresh your knowledge, this guide will teach you how to blink an LED using Arduino in no time!
What You Need to Get Started
Before we start coding, let’s make sure you have all the necessary components and software installed.
Required Components:
- Arduino Board (Uno, Nano, or Mega)
- LED (any standard 5mm LED)
- 220-ohm Resistor (to protect the LED from excessive current)
- Breadboard (optional, but useful for building the circuit)
- Jumper Wires (to connect the components)
- USB Cable (to connect the Arduino to your computer)
- Arduino IDE (downloadable from Arduino’s official website)
Building the Circuit
To blink an LED, you need to wire up the circuit correctly. Follow these steps:
Step 1: Wiring the Circuit
- Connect the LED to the Arduino:
- The longer leg (anode) of the LED connects to pin 13 on the Arduino.
- The shorter leg (cathode) connects to one side of a 220-ohm resistor.
- The other side of the resistor connects to the ground (GND) pin on the Arduino.
This is a simple, low-power circuit, so you don’t need any additional components for this project.
Step 2: Check Connections
Double-check your wiring:
- Anode to digital pin 13
- Cathode to ground through the resistor.
Writing the Code
Now that we have the circuit set up, it’s time to write the code that will control the LED. You’ll use the digitalWrite() function to send high or low signals to the LED, causing it to blink.
Step 3: Writing the Arduino Sketch
- Open the Arduino IDE on your computer.
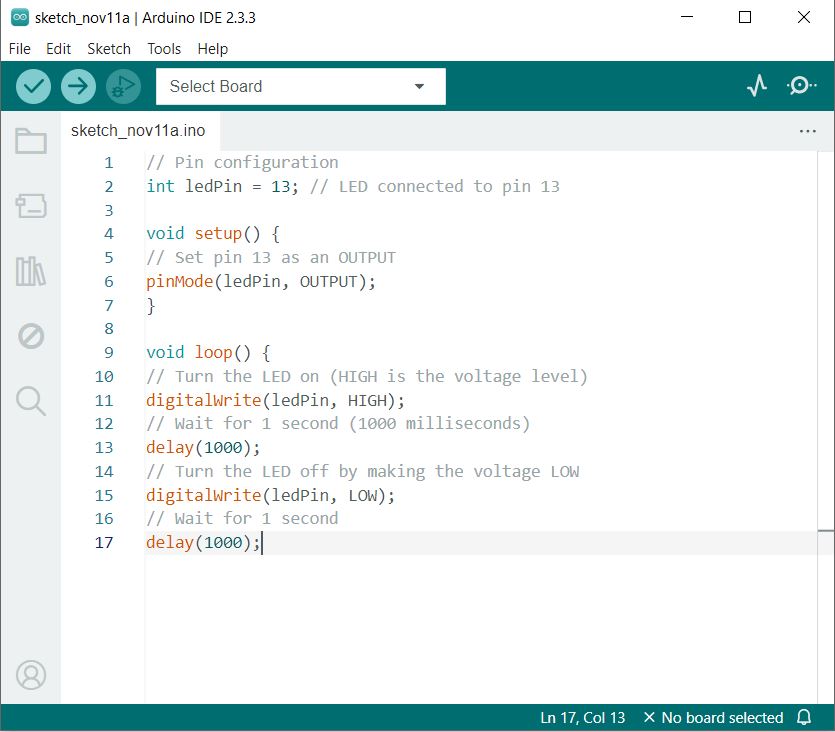
- In the Sketch window, enter the following code:
// Pin configuration
int ledPin = 13; // LED connected to pin 13

void setup() {
// Set pin 13 as an OUTPUT
pinMode(ledPin, OUTPUT);
}

void loop() {
// Turn the LED on (HIGH is the voltage level)
digitalWrite(ledPin, HIGH);
// Wait for 1 second (1000 milliseconds)
delay(1000);
// Turn the LED off by making the voltage LOW
digitalWrite(ledPin, LOW);
// Wait for 1 second
delay(1000);
}
Step 4: Code Breakdown
pinMode(ledPin, OUTPUT);– Sets pin 13 as an output pin, which controls the LED.digitalWrite(ledPin, HIGH);– Sends a HIGH signal (5V) to pin 13, turning the LED on.delay(1000);– Pauses the program for 1000 milliseconds (1 second).digitalWrite(ledPin, LOW);– Sends a LOW signal (0V) to pin 13, turning the LED off.delay(1000);– Pauses for another second before repeating the loop.
Uploading the Code to the Arduino
Once the code is written, it’s time to upload it to the Arduino board:
- Connect your Arduino to your computer using a USB cable.
- In the Arduino IDE, select your board model (e.g., Arduino Uno) and port under Tools > Board and Port.
- Click the Upload button (the arrow icon in the top-left of the IDE).
- Wait for the “Done uploading” message in the status bar.
- Your LED should start blinking once the upload is complete!
Troubleshooting Tips
- LED not blinking?
- Ensure the LED is connected correctly (longer leg to pin 13, shorter leg to ground via the resistor).
- Check the Arduino’s connection to your computer.
- Make sure your code has no syntax errors (the IDE will highlight them in red).
- LED stays on or off:
- Ensure the resistor is properly placed to limit current.
- Check your Arduino’s pinMode() settings.
Conclusion
Congratulations! You’ve learned how to blink an LED using Arduino. This simple project helps you understand the basics of programming, electronics, and the Arduino platform.